Your Butterfinger Cream Cheese Pie is a Disaster: Soggy Bottoms, Seized Chocolate, and Split Fillings Explained
You opened the oven door, anticipating a golden-brown crust and a luscious, smooth filling, only to be met with a pool of liquid at the bottom and a curdled topping. Or perhaps your carefully crafted chocolate drizzle hardened into unmanageable shards. Don’t despair. This guide will dissect every potential failure in your Butterfinger cream cheese pie, from ingredient selection to the final flourish, equipping you with the knowledge to achieve creamy, crisp perfection.
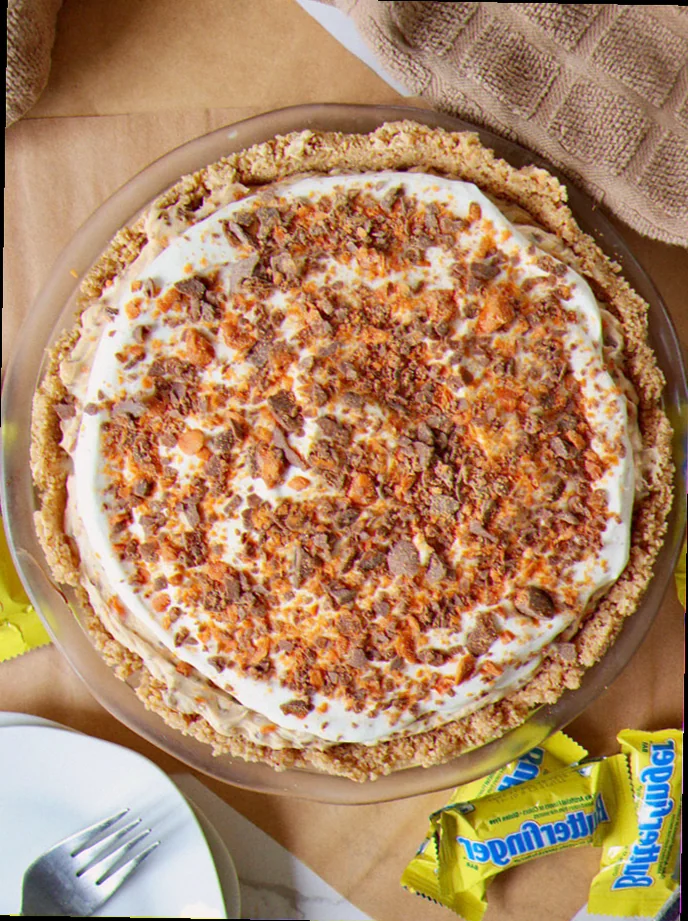
What Perfect Butterfinger Cream Cheese Pie Actually Looks, Feels, and Tastes Like
| Stage | Success marker — what you should see / feel / smell / hear |
|---|---|
| Crust (Raw) | A crumbly, cohesive mixture that holds its shape when squeezed; smells faintly of toasted butter and graham cracker. |
| Filling (Mixed) | A thick, impossibly smooth, pale ivory batter with no streaks of cream cheese; smells subtly sweet and tangy. |
| Baking (Mid) | The edges of the crust are golden brown, and the filling is set around the perimeter, with a slight wobble in the center (around 175°C). |
| Finished Pie | The filling is firm to the touch, with a barely perceptible jiggle in the absolute center; the crust is deeply golden. Smells richly of cream cheese, butter, and a hint of vanilla. |
| Sliced & Served | A clean slice with distinct layers: crisp crust, velvety smooth filling, and crunchy Butterfinger pieces. The texture is rich and decadent, with a delightful contrast between creamy and crunchy. Flavour is a harmonious blend of sweet, tangy, buttery, and nutty caramel. |
The Ingredient Failures — Wrong Choices Before You Even Start Cooking
- Soggy Crust: caused by using melted butter that has cooled too much, or insufficient toasting of the graham cracker crumbs. The fat doesn’t bind the crumbs effectively, leading to a weak structure. → fix: Use 170g of melted butter, but ensure it’s still warm (not hot) when mixed with 280g of finely crushed graham crackers. Toast the crumb mixture in a 175°C oven for 8-10 minutes until fragrant and visibly browned.
- Grainy Filling: caused by using cold cream cheese straight from the refrigerator. Cold cream cheese contains rigid fat globules that are difficult to emulsify smoothly. → fix: Ensure your 680g of full-fat cream cheese is softened to room temperature (approximately 1-2 hours on the counter, or 30 seconds in the microwave on low power). It should yield easily to the touch.
- Watery Filling: caused by using low-fat cream cheese or sour cream that contains excess water. → fix: Always use full-fat (100% milk fat) cream cheese. If using sour cream, opt for full-fat versions and consider draining it beforehand by placing it in a fine-mesh sieve lined with cheesecloth for 30 minutes.
- Seized Chocolate Drizzle: caused by adding liquid (even water from steam) to melted chocolate. Chocolate is sensitive to moisture and will clump and seize if exposed. → fix: When melting your 100g of chocolate for the drizzle (using a double boiler or microwave on 50% power in 30-second intervals), ensure absolutely no water or steam comes into contact with it. Use a clean, dry bowl and spatula.
The Technique Failures — What Goes Wrong During Cooking
- Split Filling: what it looks/tastes like – the filling has separated into a greasy, curdled mass. → caused by over-beating the cream cheese mixture after adding eggs, or adding eggs to a mixture that is too hot. → fix: After creaming the softened cream cheese with sugar, add eggs one at a time, mixing on low speed just until incorporated. If your cream cheese mixture feels warm from beating, let it cool for 5 minutes before adding the eggs. Bake at 160°C.
- Rubbery Texture: what it looks/tastes like – the filling is dense, chewy, and unpleasant. → cause: Overbaking the pie. The proteins in the eggs and cream cheese continue to cook and toughen past the point of desirable set. → fix: Bake the pie until the edges are set but the center has a slight, gentle wobble (like Jell-O). An instant-read thermometer inserted near the center should register around 71°C. Remove from the oven and let it finish setting as it cools.
- Flat Rise (or lack thereof): While not a “rise” in the cake sense, a filling that doesn’t set properly can appear sunken or flat. → cause: Insufficient baking time or baking at too low a temperature. The structure of the filling hasn’t solidified. → fix: Ensure your oven is calibrated to 160°C. Bake for the specified time (typically 45-60 minutes), checking for the wobble test. Don’t be tempted to pull it out too early.
- Cracked Filling: what it looks like – a network of fissures across the top of the pie. → cause: Rapid temperature changes during baking or cooling, or over-beating the filling which incorporates too much air. → fix: Bake at a consistent temperature. After removing from the oven, allow the pie to cool gradually on a wire rack for 1 hour before transferring it to the refrigerator. Avoid opening the oven door frequently during baking.
The Equipment Failures — When Your Tools Are the Problem
- Unevenly Baked Crust: what the wrong version causes – soggy patches or burnt edges. → what to use instead: A 9-inch pie plate with straight sides (preferably metal or glass for even heat distribution). → why it matters: A well-structured crust prevents the filling from seeping into the bottom.
- Overcooked Filling: the failure it produces – a rubbery, dry texture. → the fix: An instant-read thermometer is crucial for accurately gauging the internal temperature of the filling, preventing overbaking. → the workaround if unavailable: The “wobble test” is your primary guide. The center should be set but still have a slight jiggle.
- Difficult to Mix Filling: why this specific tool exists for this dish – a stand mixer or hand mixer ensures a smooth, homogenous cream cheese base without lumps. → acceptable substitute: A sturdy whisk and significant arm strength can achieve the same result, but it requires more effort and patience to fully incorporate the cream cheese.
The Full Recipe — Built Around Preventing Every Failure Above
- 280g Graham Cracker Crumbs — prevents a soggy crust by providing the base for toasting and binding.
- 170g Unsalted Butter, melted and warm — ensures proper binding of crumbs to prevent a loose, soggy crust.
- 680g Full-Fat Cream Cheese, softened — the key to a smooth, non-grainy filling.
- 200g Granulated Sugar — sweetness and structure.
- 3 Large Eggs — binder and richness, but must be added carefully to prevent splitting.
- 1 tsp Vanilla Extract — flavour.
- 100g Butterfinger Bars, chopped into small pieces — the star ingredient, ensures crunch.
- 100g Semi-Sweet Chocolate, for drizzling — for decorative finish, must be melted carefully to avoid seizing.
Method:
- Preheat Oven to 175°C. This ensures even toasting of the crust.
- Combine Graham Cracker Crumbs and Melted Butter. Mix until thoroughly moistened. Press firmly into the bottom and up the sides of a 9-inch pie plate. → This prevents a loose crust. Success marker: The mixture should hold its shape when squeezed.
- Toast the Crust. Bake for 8-10 minutes until lightly browned. → Prevents a soggy bottom. Success marker: Fragrant, golden-brown edges.
- Reduce Oven Temperature to 160°C. This is critical for gentle, even baking of the filling.
- Beat Cream Cheese and Sugar. In a large bowl with a stand mixer (or by hand with a whisk), beat the softened cream cheese and sugar on medium speed until smooth and creamy, about 2-3 minutes. → Prevents a grainy filling. Success marker: A pale ivory, completely smooth mixture with no visible sugar granules or cream cheese lumps.
- Add Eggs One at a Time. Beat on low speed just until each egg is incorporated. Do not overmix. → Prevents a split or curdled filling. Success marker: The mixture is homogenous, with no streaks of egg yolk or white.
- Stir in Vanilla Extract and Chopped Butterfinger. Mix on low speed until just combined. → Ensures even distribution of Butterfinger pieces.
- Pour Filling into Crust.
- Bake. Bake for 45-60 minutes, or until the edges are set and the center has a slight wobble. → Prevents a rubbery texture and ensures a properly set filling. Success marker: The filling is firm around the edges, with a gentle jiggle in the center. Internal temperature should be approximately 71°C.
- Cool Gradually. Turn off the oven, crack the door open, and let the pie cool in the oven for 1 hour. Then, remove from oven and cool completely on a wire rack for at least 2 hours. → Prevents cracking.
- Chill Thoroughly. Refrigerate for at least 4 hours, or preferably overnight, to allow the filling to fully set.
- Melt Chocolate for Drizzle. Using a double boiler or microwave (50% power, 30-second intervals), melt the chocolate, stirring until smooth. → Prevents seized chocolate. Success marker: Smooth, glossy melted chocolate.
- Drizzle Chocolate over Chilled Pie.
How to Rescue [Primary Entity] When It Has Already Gone Wrong
- If the Crust is Soggy: This is difficult to fully rescue. If it’s slightly damp, you can try to re-toast it gently in a 150°C oven for 10-15 minutes, but this rarely restores true crispness. If it’s very wet, the best course of action is to scoop out the filling and start over with a fresh crust.
- If the Filling is Split/Curdled: If the split is minor, you might be able to salvage it by gently reheating the mixture on very low heat and whisking vigorously, or by passing it through a fine-mesh sieve. However, this often results in a less smooth texture. If the split is significant, it’s best to start the filling again.
- If the Filling is Rubbery/Overbaked: There is no rescue for an overbaked filling; the texture is permanently altered. The best you can do is accept the texture or consider scooping out the filling and incorporating it into something else (like a no-bake dessert base, though the texture will still be compromised).
- If the Chocolate Drizzle Seized: Immediately stop stirring. Try adding 1 teaspoon of neutral oil (like vegetable or canola) and stirring very gently to see if it smooths out. If it remains clumpy, it’s best to discard it and melt a fresh batch.
Make-Ahead: Which Failures This Introduces and How to Avoid Them
Making this pie ahead of time is highly recommended for proper setting. The primary failure introduced is a weakened crust if not properly chilled.
- Failure: Soggy crust on day two.
- Cause: Moisture migration from the filling into the crust.
- Fix: Ensure the pie is fully cooled on a wire rack for at least 2 hours before covering and refrigerating. Store in an airtight container at 4°C for up to 3 days. Do not cover while still warm.
Diagnostic FAQ — Real Failures, Real Fixes
My Butterfinger Cream Cheese Pie turned out watery and unset — what went wrong?
This is likely due to watery filling, caused by using low-fat cream cheese or a watery sour cream. For your next attempt, ensure you use full-fat cream cheese and consider draining any sour cream used. The fix is to ensure adequate baking time at the correct temperature, allowing the filling to set completely.
Related topics: Strawberry and cream cheese pie recipe · Whipped cream pumpkin pie recipe · Skinny coconut cream pie recipe
It looked perfect but tasted bland and lacked that Butterfinger punch — where did I go wrong?
This points to insufficient Butterfinger integration or poor quality Butterfinger. Ensure you are using at least 100g of Butterfinger bars, chopped into small, consistent pieces. For next time, taste your Butterfingers before adding them; if they seem stale or lack flavor, they won’t rescue the pie. Also, ensure your cream cheese is full-fat for a richer base.
Everything looked perfect until I cut into it, and the filling oozed out — why did it split?
This is a classic case of a split filling. The most common cause is adding eggs too quickly or to a mixture that was too hot. Ensure your cream cheese mixture has cooled slightly before adding eggs, and incorporate them one at a time on low speed. If it’s already split, there is no easy rescue; you’ll need to start the filling again.