I spent three years getting the “dump” recipe for chicken pot pie wrong before I understood that “dump” doesn’t mean “disregard the laws of physics.” The first time I attempted this, I ended up with a literal swamp—a grey, tepid slurry of frozen peas and salty canned soup trapped beneath a lid of pale, doughy sadness. I thought the whole point of a dump recipe was that you didn’t have to think. I was wrong. The revelation that finally saved my Tuesday nights was the Thawed-and-Drained Moisture Audit. Once I realized that excess water is the sworn enemy of the flaky crust, everything changed. This isn’t just a meal you throw in a dish; it’s a strategic assembly of textures that, when handled with a bit of respect, rivals any five-hour French version.
Why Most Versions of the Dump Pot Pie Fail
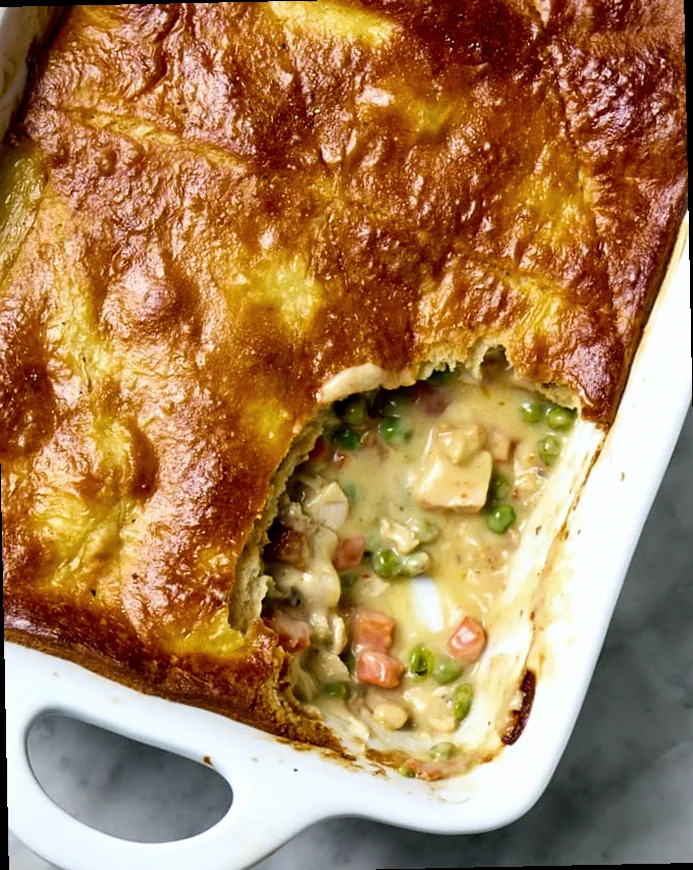
Most people approach the dump pot pie as a “frozen-to-oven” shortcut, which is the “Frozen-to-Table” fallacy. They take a bag of frozen vegetables, a cold can of soup, and a refrigerated crust, shove them into the oven, and wonder why the center is still ice-cold while the edges are burnt. This produces a “steamed” filling rather than a baked one. The crust absorbs the steam from the thawing vegetables, turning into a gummy, translucent paste that sticks to the roof of your mouth. You want a structural marvel: a bottom crust that holds its own and a top that shatters like glass when the fork hits it. The “wrong way” produces a mushy salt-bomb; my way produces a cohesive, velvety interior wrapped in gold.
The Ingredients That Actually Matter
I’ve experimented with every shortcut in the book, and I’ve learned that you cannot compromise on the chicken. I use exactly 500g of shredded rotisserie chicken. Don’t bother poaching breasts yourself; the seasoning on a store-bought bird adds a depth that a home-cooked breast just lacks. I strip the meat while it’s still warm, ensuring I get a mix of dark and light meat for the fat content.
The binder is non-negotiable: one 295ml can of condensed cream of chicken soup. I used to think I could use “healthy” versions, but they lack the emulsifiers needed to stay stable at high heat. To that, I add 120ml of heavy cream—not milk, not half-and-half, but full-fat cream. This offsets the metallic tang of the canned soup and creates a silky mouthfeel. For the vegetables, I stick to a 400g bag of standard peas, carrots, and corn, but with a caveat I’ll explain later. Finally, the crust. I use two 230g circles of high-quality refrigerated pie dough. I’ve tried making my own, and frankly, in a dump recipe context, the store-bought stuff is more consistent because it has a lower moisture content, which is exactly what we need.
The Moment Everything Changes: The Thawed-and-Drained Moisture Audit
The single technique that transformed this dish from a cafeteria disaster into a family heirloom is the Thawed-and-Drained Moisture Audit. Most recipes tell you to dump the frozen vegetables straight into the bowl. This is a lie. Frozen vegetables are encased in a micro-layer of ice. When that ice melts in the oven, it thins your sauce into a watery mess and prevents the bottom crust from crisping.
Now, I thaw my 400g of vegetables in a colander under warm water, then I press them firmly with a clean kitchen towel until they are bone-dry. By removing that 30-50ml of hidden water, the cream and the condensed soup can actually bind to the chicken. The science is simple: less water equals more concentrated flavor and a more stable emulsion. The “before” was a leaky pie; the “after” is a slice that holds its shape on the plate.
How I Actually Make It Now — Step by Step
Preheating and Preparation: I start by cranking my oven to 200°C. Temperature is everything; if you go lower, the fat in the crust melts before the starch sets, leading to a “slumped” pie. I take my 230g bottom crust out of the fridge exactly ten minutes before I need it so it’s pliable but still cold to the touch.
The Dry-Mix Assembly: In a large bowl, I combine the 500g of shredded chicken and my “audited” 400g of dry vegetables. I toss them together first without the liquid. This ensures every piece of chicken is buffered by a vegetable, preventing clumps. Then, I fold in the 295ml of soup and 120ml of heavy cream. I add a massive pinch of cracked black pepper—about 5g—but zero salt. The soup has enough sodium for a small village; adding more is the hallmark of an amateur.
The Bottom Shield: I lay the first 230g crust into a glass pie dish. I prefer glass because I can see if the bottom is browning. I then do something “illegal” in the dump-recipe world: I brush the bottom crust with a thin layer of beaten egg white. This creates a protein shield that prevents the filling from soaking into the dough.
The Filling and Sealing: I pour the mixture in, leveling it off so there are no air pockets. Air pockets expand and cause the top crust to dome and crack. I lay the second 230g crust over the top, crimp the edges with a fork like my grandmother did, and—this is vital—cut four 3cm slits in the center. Without these vents, the steam from the chicken will turn your pie into a balloon that eventually collapses into a soggy wreck.
The Golden Finish: I brush the top with the remaining egg yolk mixed with a splash of water. I bake it at 200°C for exactly 35 minutes. I’m looking for a deep mahogany brown, not a pale tan. If the edges start to darken too fast, I wrap them in foil, but I never pull the pie early. I listen for the “gurgle”—a slow, thick bubbling sound from the vents that tells me the internal starches have hydrated and thickened.
The Failures I Still See — and How to Fix Them
- The “Lava Center” Syndrome: This happens when the filling is too hot and runny when served. The fix is a mandatory 15-minute rest on the counter after baking. The starches need to cool slightly to “set” the structure. If you cut it immediately, the filling will run out like a broken dam.
- The Pale, Sad Bottom: This is caused by using a ceramic dish that takes too long to heat up. The fix is to place your glass pie dish on a preheated baking sheet. This conducts heat directly into the bottom crust the second it hits the oven.
- The Salt Bomb: This occurs when people use “seasoned” frozen vegetables or add bouillon. The fix is to rely entirely on the rotisserie chicken’s skin and the condensed soup for salt. If it tastes bland, add lemon juice, not salt. Acid cuts the fat; salt just makes it thirsty.
When I Make This and What I Serve It With
This is my “Tuesday Night Redemption” dish. It’s for those days when the weather is miserable and work was worse. I never serve it alone because the pie is heavy and rich. It needs a high-acid partner. I serve it with a crisp green salad tossed in a sharp Dijon vinaigrette to cut through the cream. I also roast a tray of 300g of balsamic-glazed Brussels sprouts; the bitterness of the charred sprouts is the perfect foil to the sweet peas and corn in the pie. To drink, it has to be a dry, acidic apple cider or a very cold, unoaked Chardonnay. You need something to scrub your palate between those rich, buttery bites.
Substitutions I’ve Tested Honestly
- Rotisserie Chicken → Leftover Turkey: I tried this after Thanksgiving. It works perfectly, though turkey is drier, so I usually add an extra 30ml of cream to compensate.
- Pie Crust → Canned Biscuits: I tested this for a “true” dump experience. It’s acceptable, but you lose the bottom crust entirely, turning it into a cobbler. It’s a 6/10; the biscuit bottoms often stay raw.
- Heavy Cream → Greek Yogurt: I tried this once in a fit of health-consciousness. It was a disaster. The heat caused the yogurt to curdle, leaving me with a grainy, acidic mess. Never again. If you want lower fat, just eat a smaller slice.
Questions I Get Asked About Dump Pot Pie
Can I make this in a slow cooker?
Absolutely not. A slow cooker is a moisture trap. You will end up with chicken soup with wet crackers on top. Pot pie requires the dry, convective heat of an oven to achieve the necessary textures.
Related topics: Weight watchers crustless pot pie recipe · Simple recipe for chocolate pie · Recipe apple pie crust
Why is my filling still runny even after resting?
You skipped the “Moisture Audit.” If you don’t drain those vegetables and use full-fat cream, the water-to-fat ratio is off. Next time, add a teaspoon of cornstarch to your cold soup before mixing.
Can I freeze it before baking?
Yes, and it’s actually better that way. Assemble it fully, but don’t do the egg wash. Freeze it solid. When you’re ready, bake it at 190°C for 60 minutes. The slow thaw-in-oven process actually helps the bottom crust stay crisp as the filling heats up gradually.