The most catastrophic failure of the Mason Woodruff pumpkin pie cheesecake is the Rubbery Protein Brick. Instead of a creamy, custardy slice, you are left with a dense, sponge-like texture that bounces against the fork and tastes of dry protein powder. This diagnostic guide identifies every failure mode—from the “Grainy Grit” to the “Soggy Base”—and provides the clinical fixes necessary to ensure your macro-friendly dessert actually tastes like a cheesecake.
What Perfect Pumpkin Pie Cheesecake Actually Looks, Feels, and Tastes Like
Before diagnosing your failure, you must understand the benchmark. Mason Woodruff’s recipes prioritize high protein and low fat, which means the margin for error is slimmer than a traditional full-fat cheesecake.
| Stage | Success marker — what you should see / feel / smell / hear |
|---|---|
| Batter Prep | A glossy, completely homogenous pale-orange liquid. No visible white specks of cream cheese or dry powder clumps. It should pour like heavy cream, not thick paste. |
| Mid-Bake (160°C) | The edges are slightly puffed and matte, but the center 2-inch circle still “jiggles” like firm gelatin when the pan is tapped. A faint aroma of cinnamon and nutmeg fills the kitchen. |
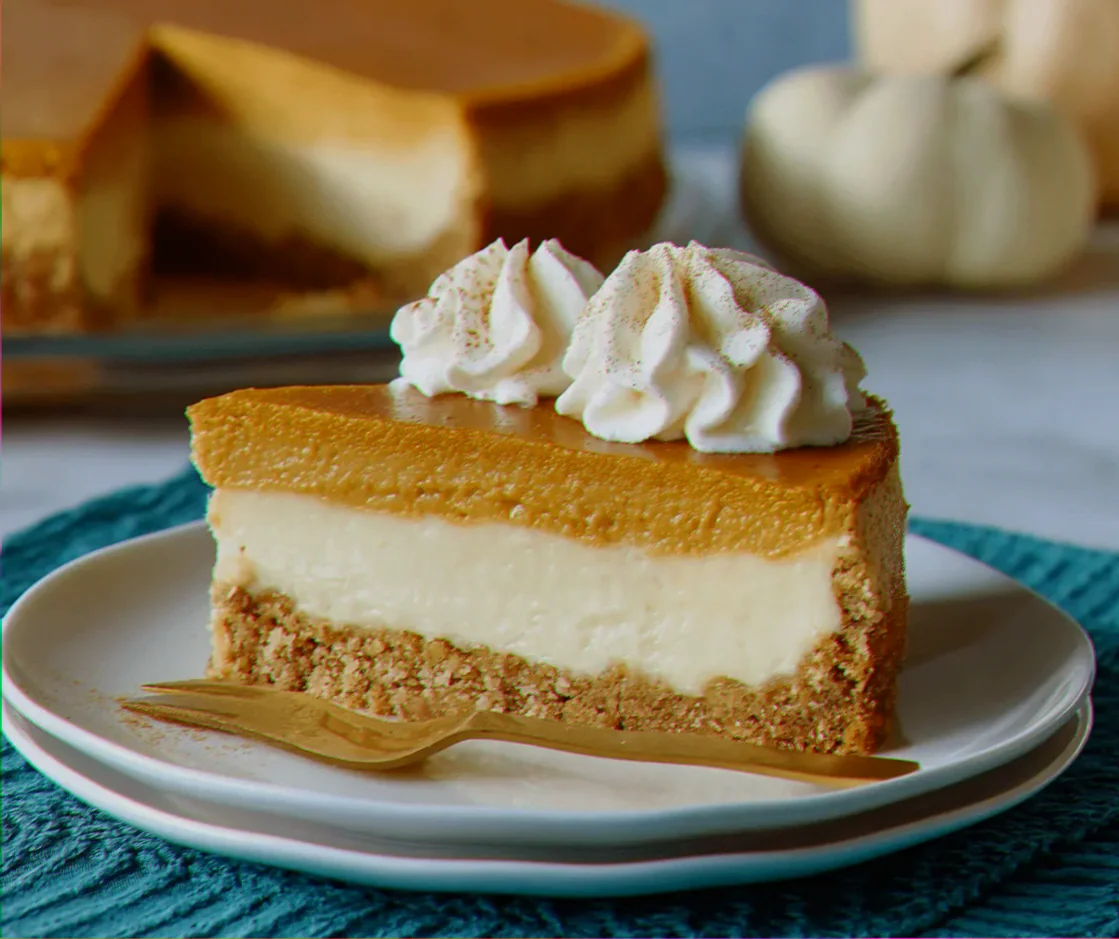
| Finished Cooling | The surface is flat and level with no visible fissures or cracks. The color is a deep, muted burnt orange. It feels cool and firm to a light finger touch. |
| The First Bite | A velvety, melt-on-the-tongue texture that dissolves without chewing. The flavor sequence starts with bright pumpkin, followed by warm spice, and finishes with the tang of Greek yogurt. |
The Ingredient Failures — Wrong Choices Before You Even Start Cooking
- The Grainy Grit: caused by using 100% Whey Protein Isolate → fix: Use a Whey/Casein Blend (e.g., PEScience). Pure whey becomes hydrophobic and “gritty” when heated; casein provides the structural creaminess required for a cheesecake mouthfeel.
- The Soupy Filling: caused by using “Pumpkin Pie Filling” instead of “Pumpkin Puree” → fix: Use 100% Pure Canned Pumpkin. Pie filling contains added water and sugar syrups that prevent the protein-yogurt matrix from setting.
- The Lumpy Matrix: caused by cold cream cheese or Greek yogurt → fix: Ensure all dairy is at Room Temperature (approx. 21°C). Cold cream cheese will never emulsify with pumpkin; it will remain as small, waxy beads that ruin the texture.
- The Artificial Aftertaste: caused by low-quality stevia or over-concentrated liquid sweeteners → fix: Use a Granulated Erythritol/Monk Fruit blend (like Swerve). These provide the bulk needed to mimic sugar’s structural role in the bake.
The Technique Failures — What Goes Wrong During Cooking
- The Surface Fissure (Cracking): what it looks like: deep lightning-bolt cracks across the top → caused by Over-aeration (whisking too fast) or Thermal Shock → fix: Use a food processor or blender on the lowest setting just until smooth, and never open the oven door during the first 30 minutes of baking.
- The Rubbery Protein Brick: symptom: a texture like a pencil eraser → cause: Over-baking beyond the protein’s coagulation point → fix: Pull the cheesecake when the internal temperature hits 65°C-68°C. If you wait until the center is firm, you have already failed.
- The Soggy Base: symptom: the crust is a damp, flavorless mush → cause: Moisture Migration from the pumpkin filling into the raw crust → fix: Blind-bake the crust at 175°C for 8 minutes and let it cool completely before adding the filling. This creates a moisture barrier.
- The Weeping (Syneresis): symptom: a pool of water forms on top or under the cake after chilling → cause: Rapid Cooling. The proteins contract too quickly and squeeze out moisture → fix: Turn off the oven, crack the door 2 inches, and let the cake sit inside for 60 minutes before moving it to the counter.
The Equipment Failures — When Your Tools Are the Problem
- Standard Cake Pan: causes the “Stuck-Bottom Failure” where the cake breaks during removal. Use a 20cm (8-inch) Springform Pan with a removable collar.
- The Direct Heat Failure: causes burnt edges and a raw center. Fix: Use a Baking Sheet on the rack below filled with 500ml of water. This creates a humid environment without the hassle of a traditional water bath (bain-marie) which often leaks into Mason’s lighter crusts.
- Manual Whisking: causes “The Lumpy Matrix.” Because this recipe uses protein powder, manual whisking is insufficient to hydrate the powder. Use a High-Speed Blender or Food Processor to ensure the powder and pumpkin are fully integrated.
The Full Recipe — Built Around Preventing Every Failure Above
- Graham Cracker Crumbs (or Ginger Snaps) — 100g — [Prevents structural collapse of the base]
- Light Butter (Melted) — 30g — [Prevents the crust from being too dry/crumbly]
- Fat-Free or Low-Fat Cream Cheese — 225g (1 block) — [Must be room temperature to prevent Lumpy Matrix]
- Plain Non-Fat Greek Yogurt — 150g — [Provides the necessary acid to soften the protein powder texture]
- 100% Pure Pumpkin Puree — 245g — [Ensures correct moisture levels; prevents Soupy Filling]
- Whey/Casein Protein Powder (Vanilla or Pumpkin Spice) — 60g — [Casein prevents the Grainy Grit]
- Granulated Sweetener — 50g — [Prevents the artificial “chemical” notes of liquid drops]
- Large Egg — 1 unit — [Prevents the cake from failing to set; provides the “lift”]
- Pumpkin Pie Spice & Vanilla Extract — [Masks the “protein” scent]
Method:
- Pre-heat and Prep: Set oven to 160°C. Grease your springform pan — [prevents the cake from sticking and tearing during the cooling contraction].
- The Barrier Crust: Mix crumbs and butter. Press firmly into the pan. Bake for 8 mins at 175°C — [prevents Soggy Base] — success marker: The crust should smell toasted and look one shade darker.
- The Emulsion: In a food processor, combine cream cheese and sweetener. Blend until no lumps remain — [prevents Lumpy Matrix] — success marker: A smooth, buttery paste.
- The Integration: Add pumpkin, yogurt, and protein powder. Pulse on LOW — [prevents Surface Fissure from over-aeration] — success marker: A thick, uniform orange cream.
- The Final Bind: Add the egg last. Pulse only 3–4 times until just incorporated — [over-mixing the egg is the #1 cause of the Rubbery Protein Brick] — success marker: No yellow streaks remaining.
- The Controlled Bake: Pour onto the cooled crust. Place a tray of water on the bottom rack. Bake at 160°C for 35–45 minutes — [prevents uneven cooking] — success marker: The edges are set, but the center moves like a bowl of Jell-O when shaken.
- The Curing Process: Turn oven off. Crack door. Leave for 1 hour. Then, refrigerate for at least 6 hours — [essential to prevent Syneresis/Weeping] — success marker: The cake should feel cold and dense to the touch.
How to Rescue the Cheesecake When It Has Already Gone Wrong
- If the Surface Fissure has happened: This is purely aesthetic. Rescue: Whip 100g of Greek yogurt with a pinch of sweetener and spread it over the top. The “topping” hides the crack and adds moisture to a potentially dry top.
- If the Rubbery Protein Brick has happened: You cannot un-cook the protein. Rescue: Slice the cheesecake into small cubes and serve it as “Cheesecake Bites” mixed into a bowl of protein pudding or oatmeal. The added moisture from the pudding masks the rubbery texture.
- If the Soupy Filling has happened (Underbaked): If you cut into it and it runs, it is a catastrophic failure for a slice. Rescue: Scoop the entire thing into a blender, add a splash of almond milk, and blend it into a “Pumpkin Cheesecake Smoothie.” It will be the best smoothie you’ve ever had, even if the “cake” failed.
Make-Ahead: Which Failures This Introduces and How to Avoid Them
Making this 24–48 hours in advance is actually preferred, but it introduces the Condensation Failure.
- The Failure: Droplets of water form on the surface, dissolving the sweetener and creating a sticky, slimy film.
- The Cause: Placing a warm cheesecake in the fridge or covering it tightly with plastic wrap while it still has residual heat.
- The Fix: Let the cake reach absolute room temperature (2 hours). Place a paper towel over the top of the springform pan, then secure with foil. The paper towel absorbs the “sweat” while the cake chills at 4°C.
Related topics: Paleo pumpkin pie recipe · Whipped cream pumpkin pie recipe · Weight watchers crustless pot pie recipe
Diagnostic FAQ — Real Failures, Real Fixes
My cheesecake turned out like a sponge with holes in it — what went wrong?
This is the Aeration Failure. You likely used a high-speed blender or whipped the eggs too long. The air bubbles expanded in the oven and then collapsed, leaving a sponge-like crumb. Next time, fold the eggs in by hand or use the lowest pulse setting.
It looked perfect until I took it out of the fridge, then it became “wet” — why?
This is Syneresis. You likely used “Fat-Free” cream cheese which has a higher water content and lower stability than “Low-Fat” (Neufchâtel). The protein structure couldn’t hold the water as it chilled. Use a Whey/Casein blend next time; the casein absorbs that excess moisture.
It tastes like “health food” and has a bitter finish — where did I go wrong?
This is the Sweetener/Protein Conflict. Some protein powders (especially those with Stevia) become bitter when baked. The Fix: Increase your Pumpkin Pie Spice by 25% and ensure you