I spent six years producing what I can only describe as “Oregon Berry Soup” before I finally understood the chemistry of the Oregon berries cherry pie recipe. For the longest time, I thought I was failing at the crust, but the real villain was the water content of the fruit itself. It wasn’t until I stumbled upon the Juice Reduction Strategy that my pies transformed from purple puddles into the structural masterpieces they are today. That single revelation—treating the juice as a separate architectural element rather than an accidental byproduct—changed my kitchen life forever.
Why Most Versions of the Oregon Berries Cherry Pie Recipe Fail
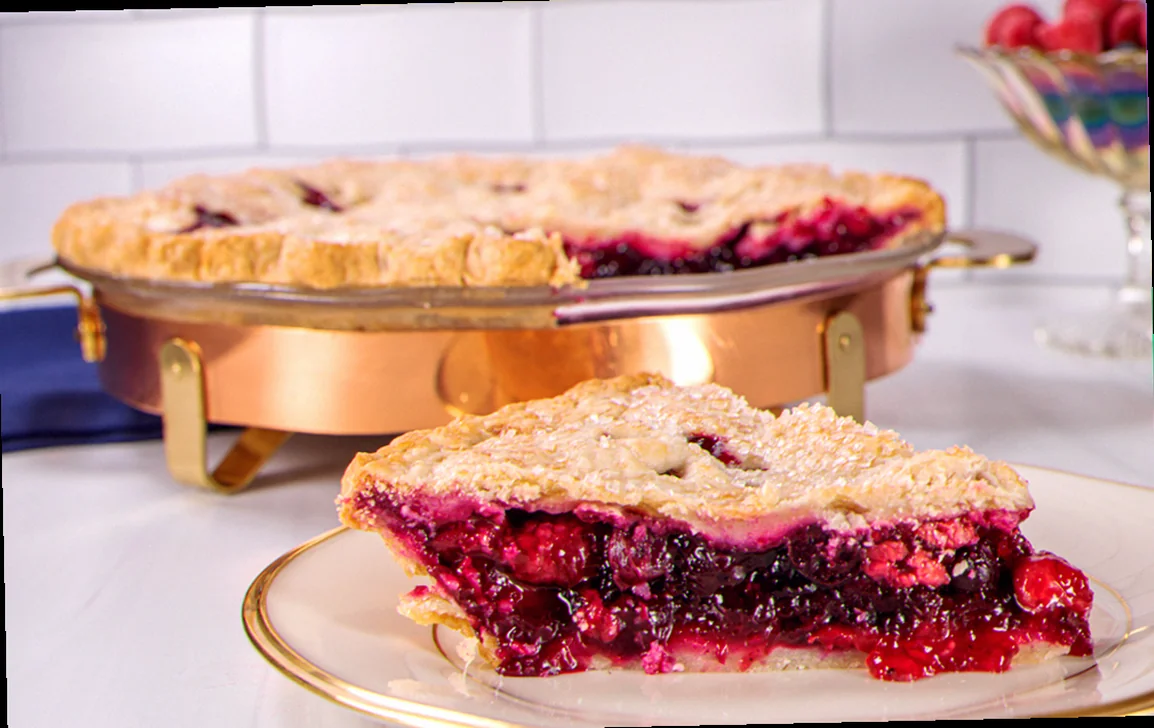
Most people approach this pie with the “Dump and Pray” method. They toss their fruit with sugar and flour, dump it into a raw crust, and hope for the best. This is a catastrophic error. Because Oregon’s pride—the Montmorency sour cherry and the mighty Marionberry—are so incredibly juicy, this method produces a “Soggy Bottom” that is essentially a wet noodle. You end up with a filling that tastes like boiled starch and a bottom crust that has the structural integrity of wet cardboard. The “wrong way” focuses on adding more thickener to compensate for the liquid, which just results in a cloudy, gummy “Purple Sludge” that masks the vibrant, acidic snap of the berries. You want a slice that stands up on its own, shimmering like a stained-glass window, not something you have to eat with a straw.
The Ingredients That Actually Matter
I don’t even look at a recipe that calls for canned filling; that’s an insult to the Willamette Valley. I start with 700g of pitted Montmorency sour cherries. These are non-negotiable because their high acidity balances the sugar in a way sweet Bings never will. To that, I add 300g of fresh Marionberries. I’ve tried using blackberries, but they are too seedy and lack the complex, earthy undertone of a true Oregon Marionberry.
For the sweetener, I’ve settled on 200g of granulated white sugar. I once tried brown sugar, but it muddied the color of the fruit. To bind it all together, I use 40g of small-pearl tapioca that I’ve pulsed in a spice grinder. Flour makes the filling cloudy; cornstarch makes it look like plastic; but ground tapioca gives it a clear, professional sheen.
Then there is the crust. I use 350g of all-purpose flour—specifically a lower-protein brand to keep it tender—and 225g of unsalted butter that I keep in the freezer until the very second I need it. I also add 5g of kosher salt, because a bland crust is a missed opportunity. The final secret ingredient is 15ml of apple cider vinegar in the ice water. It inhibits gluten development, giving me a safety net so the crust doesn’t turn into a rubber tire if I overwork it.
The Moment Everything Changes: The Juice Reduction Strategy
The epiphany happened when I realized that the fruit and the juice have different cooking requirements. If you cook the berries long enough to thicken the juice, the berries turn to mush. If you cook them just enough to keep the berries whole, the juice stays thin. The Juice Reduction Strategy solves this. You macerate the fruit first, draw out the liquid, and boil that liquid down into a concentrated syrup before it ever touches the crust. This allows you to achieve a perfect set with half the thickener. It intensifies the flavor exponentially and ensures that the bottom crust stays crisp because the “active water” has already been tamed.
How I Actually Make It Now — Step by Step
The Maceration Phase: I toss the 700g of cherries and 300g of Marionberries with the 200g of sugar in a large glass bowl. I let this sit for at least two hours. I’m looking for the sugar to pull out at least 250ml of deep red juice. If you rush this, that juice will come out in the oven instead, and you’ll have a gap between the fruit and the top crust.
The Syrup Concentration: I strain the fruit through a fine-mesh sieve, catching every drop of that liquid. I pour the juice into a small saucepan and simmer it over medium heat until it reduces by half. I’m watching for it to become syrupy and coat the back of a spoon. This is the “liquid gold” that carries all the flavor. Once it’s thick, I whisk in the 40g of ground tapioca and a squeeze of lemon juice, then pour it back over the fruit.
The Fat Integration: While the fruit is macerating, I tackle the dough. I grate the 225g of frozen butter directly into the 350g of flour. I don’t use a food processor—it’s too violent. I use my fingertips to toss the shards until they look like coarse crumbs. I add 60ml of ice water mixed with the vinegar, one tablespoon at a time. I’m looking for a “shaggy mass” that just barely holds together when squeezed. If it looks like smooth play-dough, you’ve added too much water and ruined it.
The Chilling Mandate: I wrap the dough and let it rest in the fridge for at least an hour. This allows the flour to fully hydrate and the butter to firm up again. If you skip this, the crust will shrink down the sides of the tin like a sad pair of socks.
The Assembly and Venting: I roll out the bottom crust to about 3mm thickness and drape it into a 23cm glass pie plate. I pile in the fruit mixture, which should now be thick and glossy. I always do a lattice top. This isn’t just for aesthetics; the Marionberries release a lot of steam, and a solid top crust will often trap that steam, making the filling watery. A lattice provides dozens of chimneys for that moisture to escape.
The Heat Blast: I preheat my oven to 220°C with a heavy baking sheet inside. I slide the pie onto that hot sheet. This “thermal shock” cooks the bottom crust instantly, sealing it against the fruit juice. After 20 minutes, I drop the temperature to 175°C and bake for another 45 minutes. I’m listening for the filling to bubble—not just at the edges, but in the center. If it’s not bubbling, the tapioca hasn’t activated, and it won’t set.
The Failures I Still See — and How to Fix Them
- The Gaping Void: This is when you cut the pie and there’s a 2-inch gap between the fruit and the top crust. It’s caused by not macerating the fruit long enough. The fruit shrinks as it cooks; if you don’t pre-shrink it with sugar, the “arch” of the crust stays high while the fruit collapses. Fix: Macerate for a full 2 hours.
- The Raw Flour Chalk: If you see white streaks in your filling, you’ve used raw flour as a thickener and didn’t cook it long enough. Flour needs to hit nearly 100°C to lose its raw taste. Fix: Switch to ground tapioca and ensure the center of the pie is bubbling vigorously.
- The Scorched Lattice: This happens when the sugar in the fruit juice boils over and burns on the crust. It’s a mess to clean and tastes bitter. Fix: Always bake the pie on a parchment-lined rimmed baking sheet. If the edges get dark too fast, wrap them in foil, but leave the center open.
When I Make This and What I Serve It With
This is my “Homecoming Pie.” I make it every July when the Marionberries hit their peak at the farmer’s market, and again for Thanksgiving using the fruit I froze during the summer. It’s too special for a random Tuesday. I always serve it with a massive scoop of high-fat vanilla bean ice cream. The cold creaminess cuts through the aggressive tartness of the Montmorency cherries perfectly. On the side, I’ll often serve a sharp, aged Oregon white cheddar. The savory, salty hit of the cheese against the sweet-tart berry filling is a regional tradition that people scoff at until they try it. For a drink, a dry, sparkling cider provides the necessary carbonation to cleanse the palate between rich, buttery bites.
Substitutions I’ve Tested Honestly
- Fresh Berries → Frozen Berries: This actually works quite well. In fact, frozen berries often release their juice more easily during maceration. Just don’t thaw them first; toss them with sugar while frozen and let them thaw in the bowl to catch the juice.
- Ground Tapioca → Cornstarch: It’s an acceptable backup, but the filling will be slightly opaque and have a “heavier” mouthfeel. Use 30g of cornstarch instead of 40g of tapioca.
- Butter → Lard: I tested a 50/50 split. The crust was flakier but lacked that essential “Oregon dairy” flavor profile. Stick to all butter for this specific fruit combo.
Questions I Get Asked About My Oregon Berries Cherry Pie Recipe
Do I really need to grind the tapioca?
Yes. If you use whole small-pearl tapioca, you’ll end up with little clear “fish eyes” in your pie. They aren’t dangerous, but the texture is distracting. Grinding them into a powder ensures a smooth, consistent gel that holds the berries in suspension.
Related topics: Bing cherry pie filling recipe canning · Recipe for cheeseburger pie without bisquick · Mutton curry pie recipe south africa
Can I use sweet cherries like Bings or Rainiers instead?
You can, but you must reduce the sugar by at least 50g and add an extra tablespoon of lemon juice. Sweet cherries lack the “spine” of sour cherries; without the extra acid, the pie will taste one-dimensional and cloying.
Why is my bottom crust still soggy despite the reduction?
You likely didn’t preheat your baking sheet. That initial blast of 220°C heat from the bottom is what fries the crust before the juices can soak in. Also, make sure you aren’t using a ceramic dish; glass or thin metal conducts heat much faster, which is what you need for a crisp bottom.