The first time I attempted a Recipe for reese peanut butter pie, I produced something that looked less like a dessert and more like a beige architectural disaster. It was 2014, and I was convinced that “no-bake” meant “no-effort.” I threw everything into a bowl, whipped it until it looked vaguely fluffy, and ended up with a soup that wept oil onto the plate. I spent the next three years getting this pie wrong—fighting graininess, soggy crusts, and that cloying, artificial aftertaste—before I hit on the revelation that changed everything: The Temperature-Tempered Emulsion. It turns out that this pie isn’t just a mix-and-dump job; it’s a delicate dance of fats and air that only works if every ingredient meets at the exact same thermal crossroads.
Why Most Versions of Recipe for reese peanut butter pie Fail
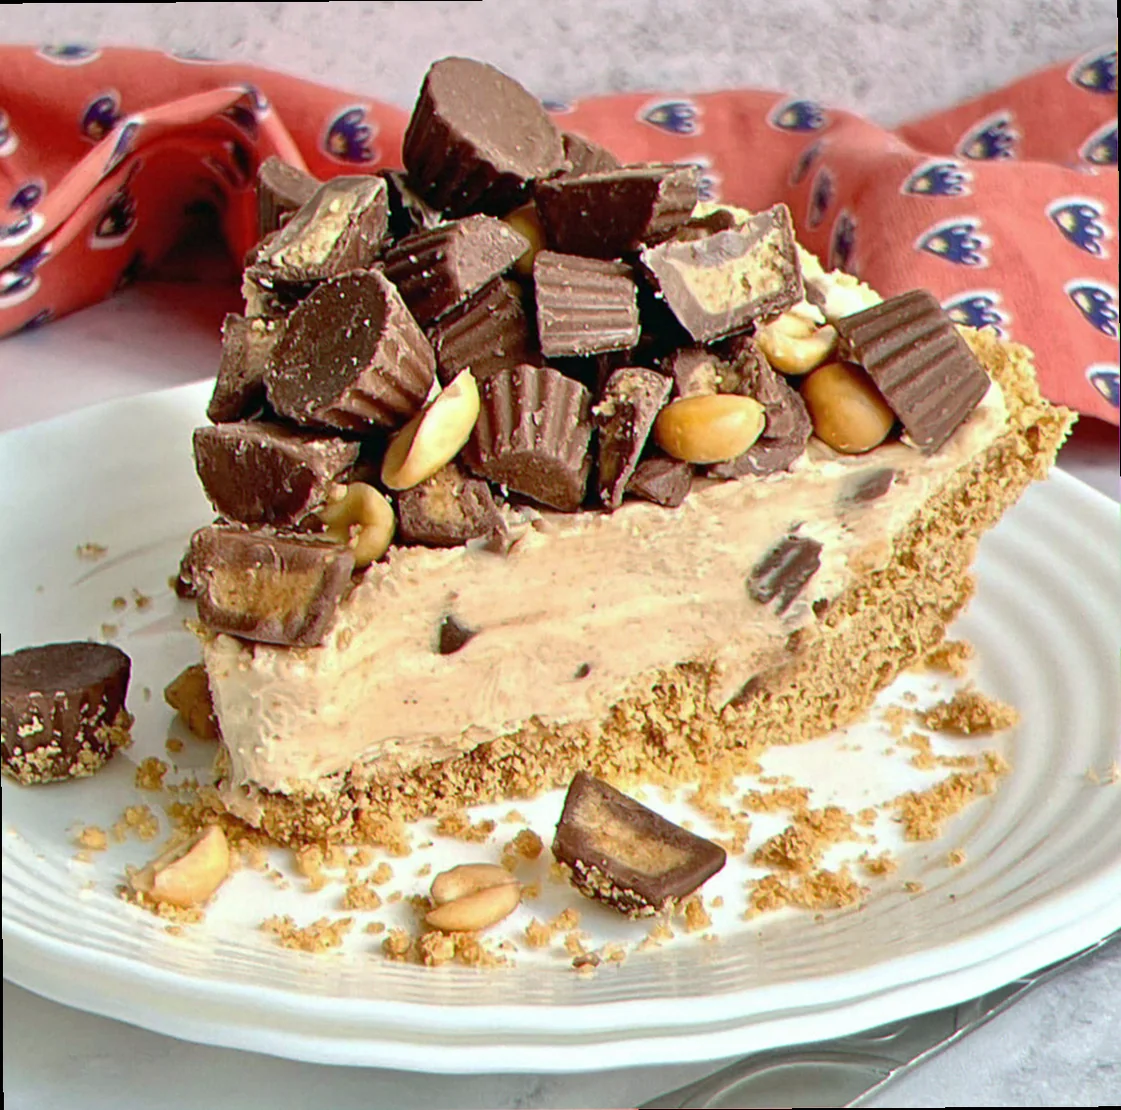
Most people approach this dish the “easy way”—the way that relies on stabilized whipped topping in a plastic tub and instant pudding mix. This is the Contrast Entity of the dessert world: the shortcut that produces a texture like edible shaving cream. It’s overly sweet, chemically stable, and fundamentally hollow. When you use those shortcuts, you lose the salt-fat-sugar tension that makes a Reese’s cup iconic. The “wrong way” results in a pie that feels light but leaves a greasy film on the roof of your mouth. A real peanut butter pie should be dense, velvety, and have the structural integrity of a cheesecake while maintaining the cloud-like lift of a mousse. If your pie doesn’t require a sharp knife to cut through its chilled richness, you’ve made a pudding, not a masterpiece.
The Ingredients That Actually Matter
I have tried every “fancy” nut butter on the shelf, and I am here to tell you that for this specific recipe, artisanal, stone-ground, oily-on-top peanut butter is your enemy. I use 250g of standard, smooth commercial peanut butter—the kind that stays emulsified at room temperature. You need that stabilizer to keep the filling from separating. To balance that salt, I incorporate 225g of full-fat brick cream cheese. Do not, under any circumstances, use the “spreadable” version from a tub; it contains too much water and will turn your pie into a puddle.
For the sweetness, I’ve found that 120g of sifted powdered sugar is the sweet spot. Anything more masks the roasted nut flavor; anything less and the cream cheese tang takes over. The lift comes from 300ml of heavy whipping cream, which must have at least 36% fat content to hold its peaks. Then there is the foundation. While many use graham crackers, I’ve moved exclusively to 200g of crushed chocolate sandwich cookies (the dark, cocoa-heavy ones) bound together with 60g of melted salted butter. The salt in the butter is non-negotiable—it’s the bridge between the dark chocolate and the sweet nut butter. Finally, the “hero” inclusion: 200g of chopped Reese’s Peanut Butter Cups, half folded into the guts of the pie and half reserved for the top, because texture is the difference between a good dessert and a legendary one.
The Moment Everything Changes: The Temperature-Tempered Emulsion
The single insight that transformed my pie from a “maybe” to a “must-have” was understanding the science of the emulsion. If you mix cold cream cheese with room-temperature peanut butter, you get tiny, insoluble “cheese pearls” that no amount of whisking can fix. The Revelation is this: Every dairy component, except the heavy cream, must be exactly 21°C. When the fats are at the same temperature, they bond into a perfectly smooth matrix that can then support the air you’re about to fold in. This creates a molecular structure that traps the peanut oil so it can’t weep out, resulting in a slice that stays firm even after thirty minutes on a warm dining table.
How I Actually Make It Now — Step by Step
The Dark Foundation: I begin by pulverizing the chocolate cookies into a fine sand. I stir in the 60g of melted salted butter until it looks like wet soot. I press this firmly into a 23cm pie tin, using the bottom of a flat measuring cup to ensure the corners are tight. I bake this at 175°C for exactly 8 minutes. This “blind bake” is the only way to prevent a soggy bottom; it sets the sugar in the cookies and creates a moisture barrier. I let this cool completely—if it’s even slightly warm, the filling will melt on contact.
The Base Emulsion: While the crust cools, I beat the 225g of softened cream cheese and 120g of powdered sugar until it’s glassy. Only then do I add the 250g of peanut butter. I watch for the color change—it should shift from a dark tan to a pale, sandy gold. I’m looking for a texture that resembles soft-serve ice cream. If I see even one lump of cream cheese, I keep going; once the cream is added, you can’t fix the lumps.
The Aeration: In a separate, chilled metal bowl, I whisk the 300ml of heavy cream. I don’t go to stiff peaks—that’s a rookie mistake that leads to a grainy mouthfeel. I stop at “semi-stiff” peaks, where the cream holds its shape but the tips curl over like a wave. This flexibility allows the cream to fold into the dense peanut butter mixture without deflating.
The Folding and Inclusion: I take a third of the whipped cream and Fold it aggressively into the peanut butter base to lighten it. Then, I gently fold in the remaining cream and 100g of the chopped peanut butter cups using a wide spatula. I stop the moment the white streaks disappear. If I over-fold, I lose the lift, and the pie becomes heavy.
The Deep Chill: I offset-spatula the filling into the crust, smoothing it to the edges. I top it with the remaining 100g of chopped cups and a drizzle of melted chocolate if I’m feeling theatrical. It goes into the fridge for at least 6 hours, though 12 is better. It needs that time for the cocoa butter in the chocolate and the fats in the cream cheese to re-solidify into a sliceable architecture.
The Failures I Still See — and How to Fix Them
- The Granular Mouthfeel: This is caused by unsifted powdered sugar or cold cream cheese. If it happens, you can’t save this batch—it will always feel “sandy.” Next time, sift your sugar and use a digital thermometer to check your cheese.
- The Weeping Filling: This is the symptom of using “Natural” peanut butter where the oil separates. The fix is to use a stabilized brand or, if you’re desperate, add an extra 30g of cream cheese to help bind the excess oil.
- The Shattering Crust: If your crust crumbles the moment the fork hits it, you didn’t press it hard enough or didn’t use enough butter. Ensure the crumbs are fully hydrated by the butter; it should feel like wet kinetic sand before it goes into the oven.
When I Make This and What I Serve It With
I reserve this Recipe for reese peanut butter pie for high-stakes family gatherings, specifically the kind where there’s a secret competition for the best dessert. It is my “closer.” Because it is incredibly rich, it needs to sit next to something acidic or bitter. I serve it alongside a bowl of macerated raspberries—the tartness cuts right through the peanut fat. For a drink pairing, I skip the milk and go for a double shot of espresso or a very dark, smoky cold brew. The bitterness of the coffee resets the palate after every decadent bite.
Substitutions I’ve Tested Honestly
- Chocolate Cookies → Graham Crackers: I’ve done it, and it’s fine, but it lacks the “Reese’s” soul. If you do this, add 15g of cocoa powder to the crumbs to keep that chocolate-peanut butter balance.
- Peanut Butter → SunButter (Sunflower Seed Butter): I tested this for a friend with a nut allergy. The result was surprisingly good, but you must increase the powdered sugar by 20g to compensate for the earthier, more bitter profile of the seeds.
- Heavy Cream → Coconut Cream: I tried this for a dairy-free version. It “works” in that it sets, but the coconut flavor is assertive and fights the peanut butter. It’s an acceptable compromise, but it’s a different pie entirely.
Questions I Get Asked About Recipe for reese peanut butter pie
Can I freeze this pie to make it last longer?
Yes, and honestly, some people prefer it that way. If you freeze it, wrap it tightly in plastic wrap to avoid “fridge smell” absorption. Let it sit on the counter for 15 minutes before slicing, or you’ll break your knife.
Related topics: Reese peanut butter cups pie recipe · Serious pie biscuit recipe · Butterfinger cream cheese pie recipe
Why is my filling yellow instead of light tan?
You likely used a generic store-brand peanut butter that uses more molasses or a darker roast. It doesn’t affect the taste much, but for that classic “Reese’s” look, stick to the major brands that have a lighter roast profile.
Can I use a pre-made store crust?
You can, but you shouldn’t. Those tins are too shallow and the crust is often stale. Making the crust takes five minutes and is the difference between a “grocery store” pie and a “legacy” pie. Use the 200g of cookies I recommended; you won’t regret the extra effort.