The first time I made Skinny coconut cream pie, it was a disaster. A shimmering, gelatinous blob in a soggy crust that tasted vaguely of disappointment. I’d seen pictures, scrolled through countless blogs, and thought, “How hard can it be?” Turns out, very hard, if you don’t understand the fundamental magic of emulsified fat and starch hydration. I spent what felt like years chasing that perfect balance, making pie after pie that was either too runny, too stiff, or just… sad.
Why Most Versions of Skinny Coconut Cream Pie Fail
Most people, myself included in my early days, approach this pie like any other custard. They just dump everything in a pot, stir it around, and hope for the best. This is the “dump and stir” method, and it’s the surest way to guarantee a pie that’s either a watery, flavourless mess or a rubbery brick. The problem is, when you don’t properly coax the starches and fats into cooperating, you end up with a texture that’s either gloopy and uneven (like wallpaper paste that’s seen better days) or chalky and dense. The coconut flavour gets lost in the muddle, and the whole experience is just… wrong. I’m talking about a pie that weeps liquid, has a gritty mouthfeel, and an aftertaste that screams “artificial sweetener overload.” It’s the antithesis of the light, airy, intensely coconutty dream I now know is possible.
The Ingredients That Actually Matter
Forget fancy extracts or obscure sweeteners. The heroes here are surprisingly simple. My cornerstone is full-fat coconut milk – the kind that comes in a can, not the watery carton stuff. I use two 400ml cans, and I never shake them before opening. I want that thick, creamy layer that sits on top. This is where the richness, the body, and the deep coconut flavour come from. For sweetness, I’ve landed on a combination that works beautifully: erythritol, about 120g, for its clean sweetness without any lingering aftertaste, and a tiny whisper of stevia extract, just a few drops, to round out the erythritol and boost the perceived sweetness without adding bulk.
The thickening agent isn’t flour, oh no. Flour is a recipe for gumminess. My go-to is cornstarch, and I use a generous 60g. This is non-negotiable. Cornstarch, when cooked correctly, creates a silky, stable custard that holds its shape without being stiff. And for that pure, unadulterated coconut punch? Unsweetened shredded coconut, about 50g, toasted until it’s fragrant and golden. This adds texture and a deeper, nuttier coconut note that you just can’t get from the milk alone. A pinch of salt is essential to amplify all these flavours, and a teaspoon of vanilla extract ties it all together.
The Moment Everything Changes: The Controlled Starch Gelatinization
The single, glorious revelation that transformed my Skinny coconut cream pie from a kitchen disaster into a showstopper was understanding Controlled Starch Gelatinization. It’s not just about heating the cornstarch; it’s about how you heat it. This is the secret sauce, the magic step, the reason why my pies are now ethereally light and impossibly smooth.
Before I grasped this, I was essentially just warming a slurry. The cornstarch granules weren’t given the chance to swell properly, leading to that gritty, uneven texture. Now, I treat the cornstarch with reverence. I whisk it with the cold coconut milk until it’s completely dissolved – no lumps allowed. Then, I heat it gently, stirring constantly. This controlled heating allows each cornstarch granule to absorb water and swell uniformly, creating a stable, silky network. The key is to bring it to a full, rolling boil for at least one minute. This sounds counterintuitive when you’re trying to keep things light, but that minute of vigorous bubbling, while still stirring, is crucial. It breaks down any residual raw starch taste and ensures maximum thickening power. Without that minute-long boil, you’ll have a runny pie. With it, you achieve a texture so smooth it feels like silk melting on your tongue.
How I Actually Make It Now — Step by Step
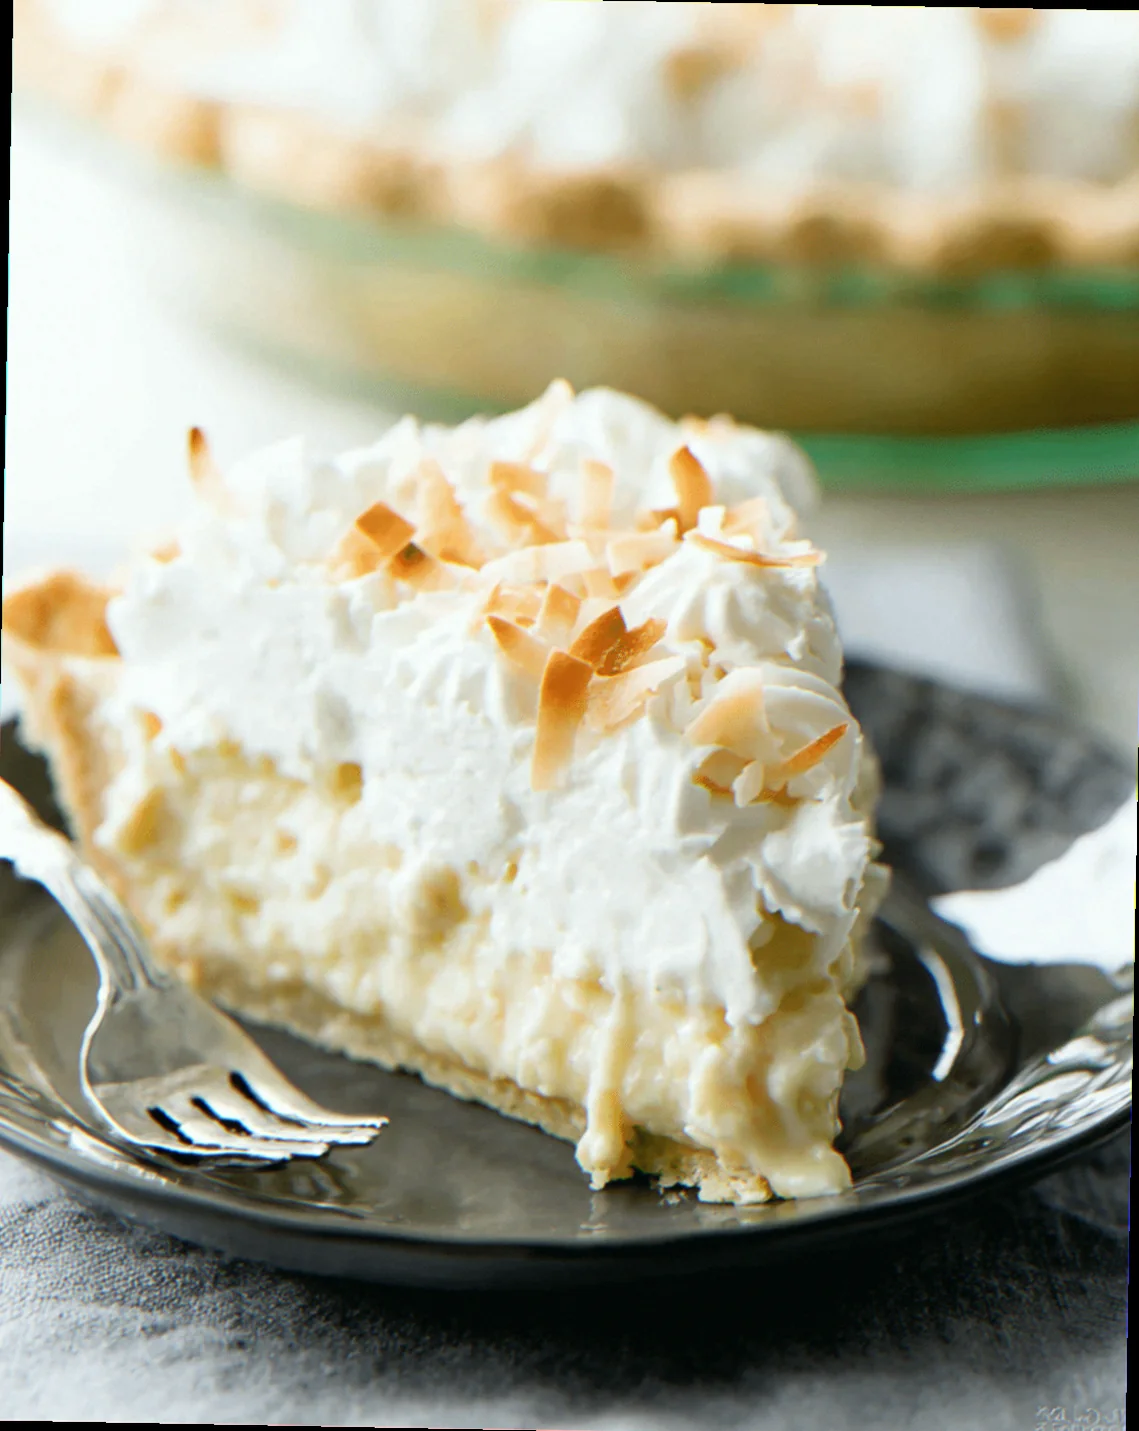
Toasting the Coconut: I spread my 50g of unsweetened shredded coconut on a baking sheet and toast it in a preheated oven at 175°C for about 8-10 minutes, or until it’s a lovely golden brown. I watch it like a hawk because it goes from perfect to burnt in seconds. The aroma tells me it’s ready – nutty, sweet, and deeply coconutty. I let it cool completely.
Creating the Base: In a medium saucepan, I combine the 240ml of coconut milk from the top of my unshaken cans (reserving the liquid part for later), the 120g of erythritol, the pinch of salt, and the few drops of stevia. I heat this gently over medium-low heat, just until it’s warm and the erythritol has dissolved.
The Starch Slurry: In a separate bowl, I whisk the remaining liquid coconut milk from the cans with the 60g of cornstarch until it’s perfectly smooth. This is where you can’t rush. Any lumps here will end up in your pie, and that’s a cardinal sin.
The Marriage: I slowly pour the warm coconut milk mixture into the cornstarch slurry, whisking constantly. This tempering step prevents the cornstarch from clumping when it hits the heat.
The Gelatinization: Now for the main event. I pour the entire mixture back into the saucepan and place it over medium heat. This is where the patience and constant stirring come in. I stir non-stop with a silicone spatula, scraping the bottom and sides of the pan. I’m looking for the mixture to start thickening. It will go from watery to slightly opaque, then to a noticeable pudding-like consistency. Once it begins to bubble, I keep stirring and let it simmer and boil gently for a full minute. This is the crucial starch gelatinization. The mixture will become thick and glossy, and you’ll hear it bubbling enthusiastically. It’s done when it coats the back of a spoon thickly.
Finishing Touches: I remove the pan from the heat. I stir in the 1 teaspoon of vanilla extract and the cooled, toasted shredded coconut. I give it one last good stir, ensuring everything is beautifully combined.
Chilling: I immediately pour the hot filling into a pre-baked pie crust (a store-bought graham cracker crust is my shortcut, and honestly, it’s perfect for this). I press a piece of plastic wrap directly onto the surface of the filling to prevent a skin from forming. Then, I let it cool on the counter for about 30 minutes before transferring it to the refrigerator to chill for at least 4 hours, or preferably overnight. This is crucial for the pie to set properly.
The Failures I Still See — and How to Fix Them
- Watery Pie: This is almost always due to insufficient starch gelatinization. You didn’t boil it long enough, or you didn’t stir enough during the boiling phase. The fix is simple: ensure that one-minute rolling boil, stirring constantly. Don’t be afraid of it!
- Gritty Texture: This happens when the cornstarch granules haven’t fully hydrated. It’s often caused by not whisking the cornstarch thoroughly into the cold liquid, or by heating it too quickly. The fix is to be meticulous with your slurry – absolutely no lumps – and to heat the mixture gently and stir constantly.
- Rubbery or Gummy Pie: This is the opposite extreme, usually caused by too much cornstarch or cooking it for too long at too high a heat after it’s already thickened. My recipe is balanced, but if you add extra cornstarch or overcook it into a solid mass, you’ll get this. The fix is to stick to the stated amounts and cooking times. If it looks too thick, trust the process; it will loosen as it cools.
When I Make This and What I Serve It With
Skinny coconut cream pie is my go-to for celebrations that feel a little lighter, or when I want something decadent but not heavy. It’s my perfect summer potluck contribution, especially when I know there will be heavy mains. It’s also my absolute favourite for post-holiday gatherings when everyone’s had their fill of rich, dark desserts.
I never serve it alone. It shines brightest next to a bright, tangy Key lime tart, the tartness cutting through the creamy coconut beautifully. For a heartier pairing, I love it after a simple, grilled lemon herb chicken. The clean flavours of the chicken and the bright citrus of the lime tart create a perfect flavour reset before diving into the creamy sweetness of the pie. And for a drink? A chilled glass of iced green tea is my absolute favourite. It’s refreshing and doesn’t compete with the delicate coconut flavour.
Substitutions I’ve Tested Honestly
- Erythritol → Allulose: I tried allulose because it browns beautifully. For the pie filling, it works, giving a slightly smoother sweetness than erythritol. However, it’s more expensive, and for me, the benefit isn’t significant enough to warrant the extra cost for this particular recipe. Verdict: Works, but erythritol is more practical.
- Cornstarch → Tapioca Starch: I experimented with tapioca starch for a dairy-free version. It does thicken, but the texture is a bit chewier and less silken than cornstarch. It also has a tendency to become stringy if overcooked. Verdict: It’s an acceptable swap if you need it, but cornstarch is superior for texture.
- Full-Fat Coconut Milk → Light Coconut Milk: Oh, the horror. I tried this once when I was out of the full-fat. The pie was thin, watery, and had a sad, pale flavour. It lacked the essential richness and body. Verdict: A hard no. Stick to full-fat for this recipe.
Questions I Get Asked About Skinny Coconut Cream Pie
My pie is still runny after chilling. What did I do wrong?
This is almost always a starch gelatinization issue. You didn’t boil it vigorously enough for a full minute. The cornstarch needs that sustained heat to swell and create a stable network. Next time, don’t be shy with the heat and the stirring during that boiling phase. Trust that it will thicken beautifully.
Can I make this ahead of time?
Absolutely! In fact, I insist on it. This pie needs at least 4 hours, preferably overnight, to set properly. You can make it a day or two in advance and keep it chilled in the refrigerator. It’s actually better when the flavours have had a chance to meld.
Related topics: Strawberry and cream cheese pie recipe · Recipe forr coconut pie · Whipped cream pumpkin pie recipe
I don’t like toasted coconut. Can I leave it out?
You can, but you’ll lose a significant layer of flavour and texture. The toasted coconut adds a nutty depth that complements the creamy filling. If you absolutely detest it, at least add an extra teaspoon of vanilla extract to try and compensate. But my honest advice? Give the toasted coconut a chance. It’s a game-changer.